
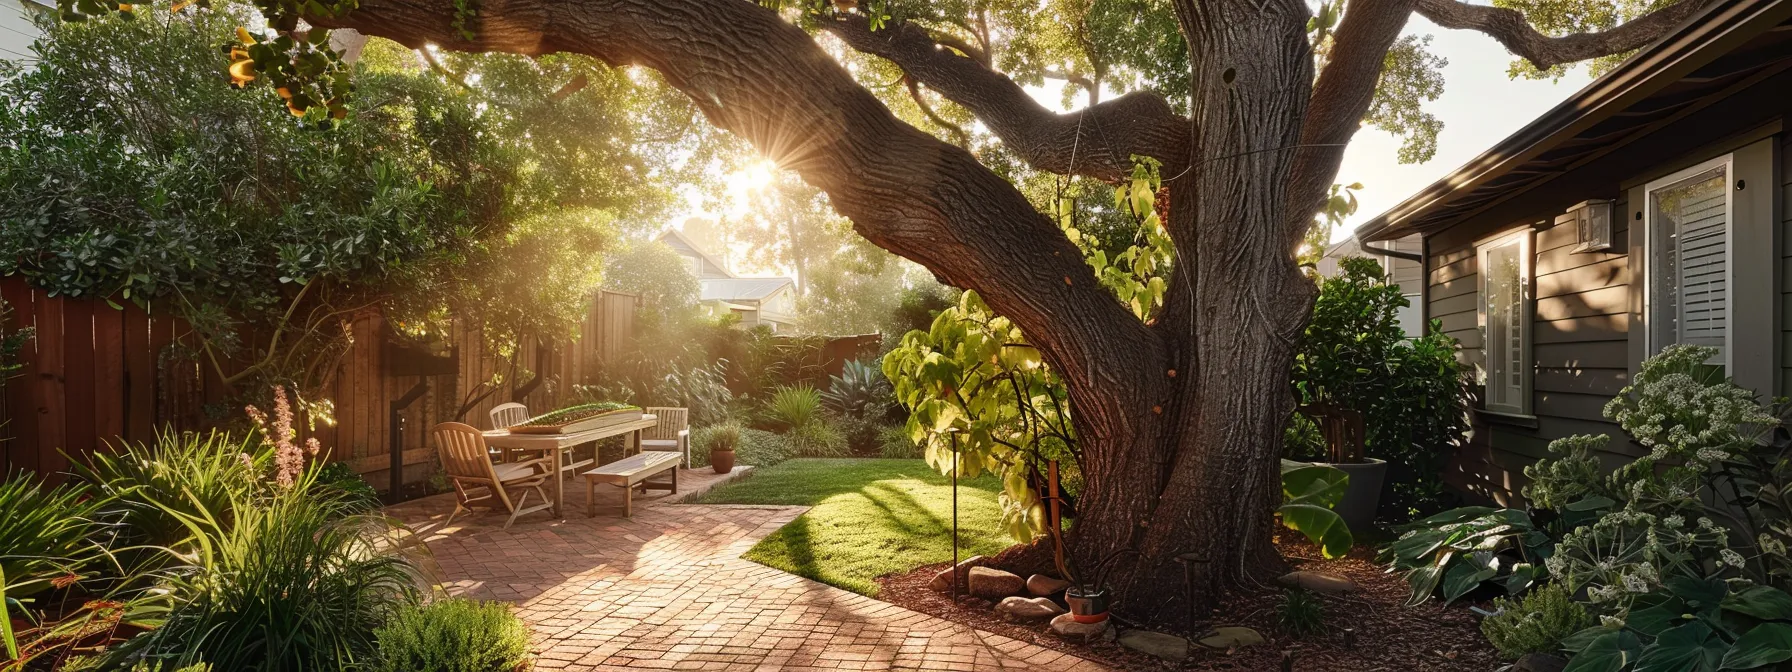
Are you considering a backyard paver project but unsure where to start? This guide covers everything from selecting the right pavers to maintaining your finished hardscape. We’ll walk you through planning, site preparation, and installation, helping you create a beautiful patio without breaking the bank. You’ll learn how to use essential tools like a tape measure and discover cost-effective ways to transform your yard. By the end, you’ll have the knowledge to confidently tackle your paver project or choose the right professional for the job.
Choosing the right pavers for a backyard project involves understanding various materials. This section explores concrete, brick, natural stone, and permeable pavers, each offering unique features. From durable concrete to classic brick, versatile natural stone like flagstone to eco-friendly permeable options, homeowners can find the perfect fit for their paver patio and fire pit projects.
Concrete pavers are a popular choice for outdoor patio installations due to their durability and versatility. These large outdoor pavers come in various shapes, sizes, and colors, making them suitable for diverse design preferences. Homeowners considering the cost of installing a paver patio will find concrete pavers to be a cost-effective option compared to natural stone alternatives like slate. Their affordability and low maintenance requirements make them attractive for those looking to create a stylish outdoor living space without breaking the bank.
Brick pavers offer a timeless appeal and exceptional durability for backyard installations. Made from natural clay, these pavers come in various shades, including warm reds, earthy buffs, and sophisticated charcoals, allowing homeowners to create unique designs. Brick creates a striking contrast that enhances outdoor aesthetics when combined with backyard artificial grass and pavers. Installers use a screed layer to ensure a level base, promoting proper drainage and longevity of the paver surface.
Natural stone pavers offer unparalleled beauty and durability for outdoor walkways and patios. These pavers come in a wide range of colors and textures, from smooth slate to rugged rock, allowing homeowners to create unique designs that complement their landscape. While natural stone may require a higher initial budget, its longevity, and low maintenance needs make it a cost-effective choice in the long run. Installers use specialized hammers and tools to shape and fit these pavers, ensuring a seamless and visually striking outdoor space.
Permeable pavers offer significant advantages for homeowners seeking eco-friendly and practical solutions for their outdoor spaces. These pavers allow water to seep through the surface, reducing runoff and preventing snow accumulation in winter. Patio paver installers near me often recommend permeable options for areas prone to drainage issues or where environmental concerns are paramount. While granite is a popular choice for its durability, permeable pavers come in various materials, each offering unique benefits. Installers use specialized tools, including chisels, to ensure proper fitting and maximize the pavers‘ permeability.
Selecting the right paver material for a backyard project requires careful consideration of factors such as climate, intended use, and aesthetic preferences. Concrete pavers offer durability and versatility, while travertine outdoor tiles provide a luxurious appearance. For those seeking a classic look, brick patio paver installation remains popular. Homeowners should also consider maintenance requirements, as some materials may require more upkeep to prevent dust accumulation. Consulting with experienced construction professionals can help determine the best paver option for specific yard conditions and design goals.
Planning a backyard paver project involves crucial steps for a successful installation. Homeowners must measure their space, design layouts, and budget for materials and labor. DIY enthusiasts should gather the necessary tools, including a garden hose for outlining. Checking local regulations and obtaining permits are essential. Professional installers can provide quotes for those seeking expert assistance with their backyard pavers and floor design.
Accurate measurement and assessment of the backyard space form the foundation of a successful paver project. Homeowners should use measuring tapes to determine the exact dimensions of the area, considering factors such as slopes and existing features like trees or outdoor travertine pavers. This process helps in calculating the quantity of patio stone pavers needed and aids in designing layouts that incorporate elements like brick borders or wood accents for added beauty. Professional installers often use laser levels to ensure precise measurements, especially when dealing with uneven terrain or complex designs.
Designing the layout and patterns for a patio using pavers requires careful planning to ensure aesthetics and functionality. Homeowners should consider various layouts, such as herringbone or running bond, to complement their outdoor space and prevent erosion. Patio paver companies near me often recommend creating a detailed plan including borders, focal points, and driveway transitions. These professionals can help select paver patterns that maximize the use of full pallets, reducing waste and costs while creating a visually stunning outdoor area.
Budgeting for a backyard paver project requires carefully considering materials and labor costs. Homeowners planning a DIY paver patio should account for essential tools like a broom and specialized equipment for cutting bluestone or other paver materials. Professional installation costs typically include labor, materials, and potential extras like curb adjustments. While DIY options can save on labor, they may require more time and skill, especially when working with complex patterns or materials like bluestone.
Gathering the necessary tools and equipment is crucial for a successful backyard paver project. Homeowners should consult patio paver contractors near me for advice on essential items, which typically include a mallet, level, and measuring tape. Specialized tools may be required for projects involving porcelain pavers or incorporating a fireplace. A robust landscape rake and sturdy wheelbarrow are indispensable for preparing the site and transporting materials efficiently.
Before building a patio with pavers, homeowners in the United States should check local regulations and obtain necessary permits. This process may involve submitting detailed plans, including using materials like porcelain tile or cement, and specifying the project’s square footage. Local authorities often have specific requirements for outdoor structures, which can vary depending on the project’s size and location within the property. Consulting with paver installation professionals can help ensure compliance with all relevant codes and regulations.
Preparing the site for paver installation is crucial for a successful backyard design. This section covers clearing and excavating the area, ensuring proper drainage, laying base material, compacting and leveling the surface, and installing edge restraints. These steps create a solid foundation for pavers, integrating with existing elements like sod and masonry while allowing for future additions such as lighting.
Clearing the area and excavating soil marks the first crucial step in preparing a site for paver installation. Homeowners must remove existing vegetation, debris, and any remnants of old concrete slabs or decks. Using a straight edge, they can mark the patio‘s perimeter, ensuring proper dimensions for the new marble or concrete pavers. Excavation depth typically ranges from 6 to 8 inches, accounting for base material and the pavers‘ thickness, while maintaining a slight slope for drainage.
Ensuring proper drainage is crucial for the longevity and functionality of paver installations. Installers must carefully shape the ground to create a slight slope away from buildings, typically 1/4 inch per foot, to prevent water pooling. A retaining wall may be necessary to manage water flow effectively for areas with significant drainage issues. Homeowners can compare various paving materials, such as travertine, to determine which best suits their drainage needs while maintaining aesthetic appeal.
Laying the base material correctly is crucial for proper drainage and a stable paver installation. Installers typically use a blend of crushed stone or gravel, spreading it evenly across the excavated area. This layer, often 4 to 6 inches deep, acts as a foundation for the pavers and aids in water drainage. Some installers incorporate a layer of plastic or landscape fabric between the soil and base material to prevent weed growth in the garden and maintain the integrity of the paver surface over time.
Compacting and leveling the surface is crucial for achieving a stable and aesthetically pleasing paver installation. Installers use a plate compactor to ensure the base material is firmly packed, preventing future settling issues. A garden hose aids in creating smooth curves for fire pit areas or curved pathways. For limestone pavers, extra care during compaction ensures the surface remains level without damaging the delicate material.
Installing edge restraints is a critical step in paver installation, providing stability and preventing shifting. Professional patio paver companies recommend using sturdy materials like plastic, metal, or concrete to create a secure border along the paver’s length. For projects incorporating sandstone or other natural materials, installers often integrate the edge restraints with existing landscape features, such as a retaining wall, to enhance both functionality and aesthetic appeal.
This section outlines the key steps in installing backyard pavers, from laying them according to design to compacting for stability. It covers cutting pavers for custom fits, maintaining consistent joint spacing, and filling joints with sand. Homeowners seeking “outdoor pavers near me” will find valuable insights on using landscape fabric and crushed stone, as recommended by patio paver contractors, to create a durable 1-inch base for their project.
Laying pavers according to the design requires precision and attention to detail. Installers begin at the perimeter, using a wheelbarrow to transport pavers efficiently. They carefully place each paver, ensuring proper alignment and level using a rubber mallet and spirit level. A thin layer of sand beneath each paver allows for minor adjustments. As the installation progresses, workers use a plate compactor to secure the pavers, paying extra attention to areas near water features to prevent future settling.
Cutting pavers for custom fits requires precision and the right tools. Professional installers use a circular saw with a diamond blade to achieve clean cuts, especially when working with durable materials like cobblestone. For smaller adjustments, a hammer and chisel can be effective. When cutting pavers near soil areas, workers place a piece of lumber underneath to prevent damage and ensure stability. This process allows for seamless integration of pavers around obstacles or along curved edges, maintaining the overall design integrity.
Maintaining consistent joint spacing is crucial for the aesthetic appeal and structural integrity of outdoor paving tiles. Installers use spacers or string lines to ensure uniform gaps between pavers, typically ranging from 1/8 to 1/4 inch. These spaces allow for proper drainage and prevent pavers from rubbing against each other, which can cause damage over time. In areas exposed to high heat, wider joints filled with gravel can help dissipate thermal expansion, while metal edging provides a clean, modern look and helps maintain spacing along the perimeter of the paved area.
Filling joints with sand is a crucial final step in paver installation. Installers use a rake to spread fine sand over the paver surface, ensuring it fills the gaps between each tile. They then use a shovel or broom to work the sand into the joints at various angles, creating a stable paver base. This process is repeated until all joints are completely filled, providing stability and preventing weed growth between the pavers.
Compacting pavers is essential for ensuring long-term stability and preventing shifting. Installers use a plate compactor with a protective rubber mat to avoid damaging the pavers’ surface. For tight spaces or corners, an angle grinder with a diamond blade can be used to make precise adjustments. Homeowners interested in professional installation can Contact Us at pavers-prescott for expert advice and services. The About Us page provides information on our experience with various paver materials and compaction techniques.
Enhancing a paver patio involves several key steps to improve its appearance, functionality, and longevity. This section covers sealing pavers for weather protection, adding decorative borders and accents, incorporating lighting features, landscaping around the paved area, and implementing safety measures. These finishing touches transform a basic patio into a stunning outdoor living space.
Sealing pavers is a crucial step in protecting the patio against weather-related damage. Professionals apply a high-quality sealer to enhance the pavers‘ color and prevent water absorption, which can lead to cracking or fading. Homeowners should choose a sealer that matches their paver material, whether it’s concrete, natural stone, or brick, to ensure optimal protection and longevity.
Adding decorative borders and accents elevates the visual appeal of a paver patio. Installers often use contrasting colors or materials to create eye-catching borders that define the space. For example, a dark granite border can provide a striking contrast to light-colored concrete pavers. Homeowners can also incorporate design elements such as inlaid patterns or mosaic accents to personalize their outdoor living area. These decorative touches not only enhance aesthetics but also help to visually separate different functional zones within the patio.
Incorporating lighting features enhances the functionality and ambiance of a paver patio. Installers often integrate low-voltage LED lights along walkways or steps for safety and visual appeal. Homeowners can choose from various options, such as recessed paver lights or bollard fixtures, to create a warm and inviting atmosphere for evening gatherings. Proper placement of lighting not only illuminates the space but also highlights key design elements, transforming the patio into an attractive nighttime retreat.
Landscaping around the paver area creates a seamless transition between the hardscape and the surrounding garden. Homeowners often incorporate drought-resistant plants or ornamental grasses along the edges to soften the patio‘s appearance. Professional landscapers may suggest installing a French drain near the paver border to manage excess water and prevent soil erosion, ensuring the longevity of both the patio and surrounding vegetation.
Safety considerations play a crucial role in enhancing paver patios. Installers often recommend adding non-slip coatings to prevent accidents, especially in areas prone to moisture. Proper lighting along walkways and steps improves visibility during evening hours. Homeowners should also ensure that patio edges are clearly defined to prevent tripping hazards, particularly when transitioning from pavers to lawn areas.
Maintaining and repairing backyard pavers is essential for their longevity and appearance. This section covers regular cleaning, weed prevention, stain removal, fixing loose pavers, and seasonal maintenance. Homeowners will learn practical techniques to keep their paver installations in top condition year-round, ensuring a beautiful and functional outdoor space.
Regular cleaning and upkeep of backyard pavers ensure their longevity and aesthetic appeal. Homeowners should sweep the paved area weekly to remove debris and prevent staining. For deeper cleaning, a pressure washer set at a low setting effectively removes dirt and grime without damaging the pavers. Applying a sealant every two to three years protects the pavers from weathering and enhances their color, maintaining the patio‘s fresh appearance.
Preventing weed growth between pavers requires a proactive approach. Homeowners can apply a pre-emergent herbicide in early spring to inhibit weed seed germination. For an eco-friendly alternative, vinegar or boiling water poured directly onto weeds effectively kills them without harming the pavers. Regular cleaning and reapplication of polymeric sand in the joints create a barrier against weed growth, maintaining the patio‘s clean appearance.
Addressing stains and spills promptly prevents permanent damage to backyard pavers. Homeowners should blot the affected area immediately with a clean cloth to absorb excess liquid. For organic stains like leaves or berries, a mixture of warm water and dish soap effectively removes the discoloration. Oil-based stains require a specialized degreaser or poultice to draw out the contaminant. After treating the stain, a thorough rinse with clean water helps restore the paver’s original appearance.
Fixing loose or damaged pavers requires prompt attention to prevent further deterioration of the patio surface. Homeowners can address minor issues by carefully removing the affected paver, adding or adjusting the base material, and resetting the paver. For cracked pavers, replacement is often necessary to maintain the integrity of the surface. Professional paver installers use specialized tools to ensure proper alignment and leveling when replacing damaged units, preserving the overall aesthetic and functionality of the backyard patio.
Seasonal maintenance of backyard pavers ensures their longevity and appearance throughout the year. In spring, homeowners should inspect for winter damage, clean the surface thoroughly, and reapply sealant if needed. Summer calls for regular sweeping and occasional pressure washing to remove stubborn stains. Fall maintenance involves clearing leaves and debris to prevent staining, while winter requires prompt snow and ice removal to avoid surface damage. By following these seasonal tips, homeowners can maintain a beautiful and durable paver patio year-round.
backyard paver installation, landscape pavers installation, outdoor paver features, paver patio maintenance