

Ready to transform your outdoor space? DIY paver installation is a rewarding project. It can elevate your yard’s look and functionality. This guide will walk you through planning your paver project, ensuring you’re well-prepared for success.
Before diving in, it’s crucial to understand the scope of your paver project. Consider the area you want to cover, your desired pattern, and any obstacles you might face. Proper planning sets the foundation for a smooth DIY paver installation process.
Paver project planning involves several key steps. First, measure your space accurately. Then, choose pavers that complement your home’s style. Lastly, gather all necessary tools and materials before starting the installation.
Key Takeaways
- Measure your space accurately before starting
- Choose pavers that match your home’s aesthetic
- Gather all tools and materials in advance
- Plan for proper drainage to prevent future issues
- Consider local building codes and permits
- Allow extra time for unexpected challenges
Essential Tools and Materials for DIY Paver Installation
You need the right tools and materials to succeed in a DIY paver installation. This guide will help you get everything needed for a smooth installation.
Must-Have Tools for a Successful Project
Make sure you have these key tools for paver installation:
- Shovel and rake for digging
- Plate compactor for soil and base prep
- Level and string line for alignment
- Rubber mallet for setting pavers
- Saw or splitter for cutting pavers
Selecting the Right Pavers for Your Space
Choose pavers that fit your outdoor space and needs. Think about:
- Material: Concrete, brick, or natural stone
- Size and shape: Square, rectangular, or interlocking
- Color and texture: Match your home’s exterior
- Durability: Weather resistance and load-bearing capacity
Additional Materials: Sand, Gravel, and Edging
Finish your paver installation with these important materials:
- Sand and gravel for pavers: Create a stable base and fill joints
- Landscape fabric: Prevent weed growth
- Edging: Secure pavers and maintain shape
- Sealant: Protect your finished project
With these tools and materials, you’re set to begin your DIY paver installation project confidently.
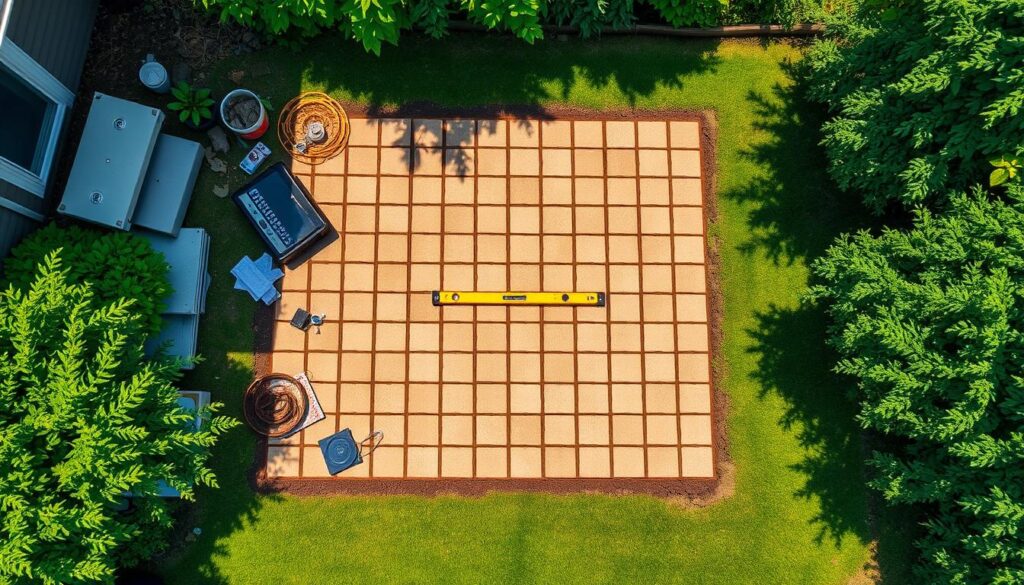
Preparing Your Site for Paver Installation
Site preparation is key for your DIY paver project. First, measure and mark the area for pavers. Then, remove any grass, weeds, and roots.
Next, level the ground. Use stakes and string to guide your work. Dig about 6-8 inches deep, depending on paver thickness and base material. Make sure the ground slopes away from buildings for drainage.
Soil compaction is vital for a solid base. Use a plate compactor to pack the soil firmly. This step prevents settling and keeps your pavers stable.
- Mark the installation area
- Remove vegetation
- Level the ground
- Excavate to the proper depth
- Compact the soil
After compaction, add a gravel layer as your base. Spread it evenly and compact it again. This base ensures drainage and support for your pavers. With the right site prep, your paver installation will last long. Don’t overlook this remarkable article.
DIY Paver Installation: A Comprehensive Guide
Ready to transform your outdoor space? Our guide will show you how to install pavers for a stunning patio or walkway. With the right tools and techniques, you’ll be laying pavers like a pro in no time.
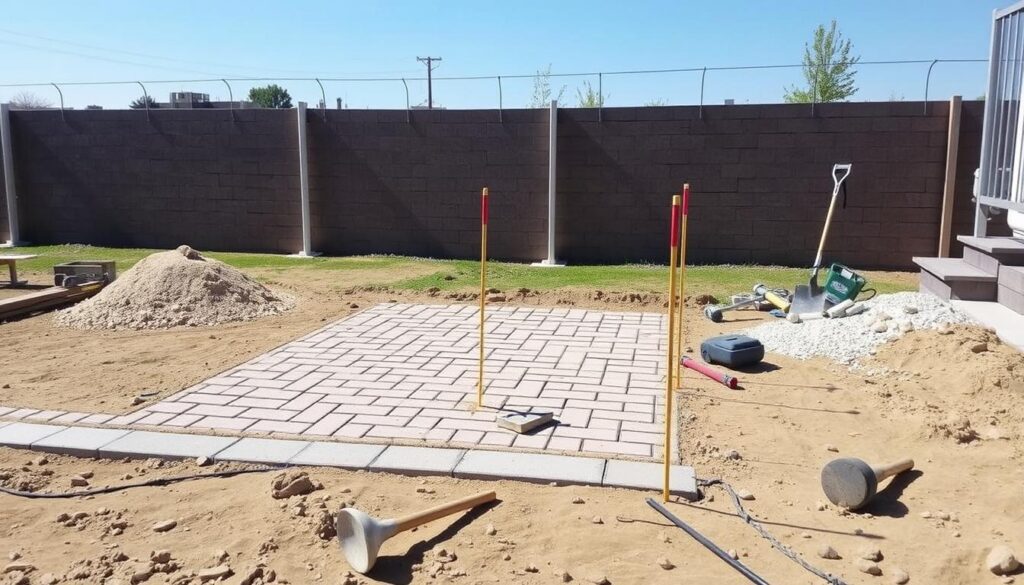
Excavating and Leveling the Area
First, mark your project area. Dig to a depth of about 7 inches. This allows for base materials and paver thickness. Use a plate compactor to make the surface firm and level.
Installing the Base Layer
Next, spread a 4-inch layer of gravel as your base. Compact it well. Then, add a 1-inch layer of sand on top. Level it with a screed board. This makes a stable foundation for your pavers.
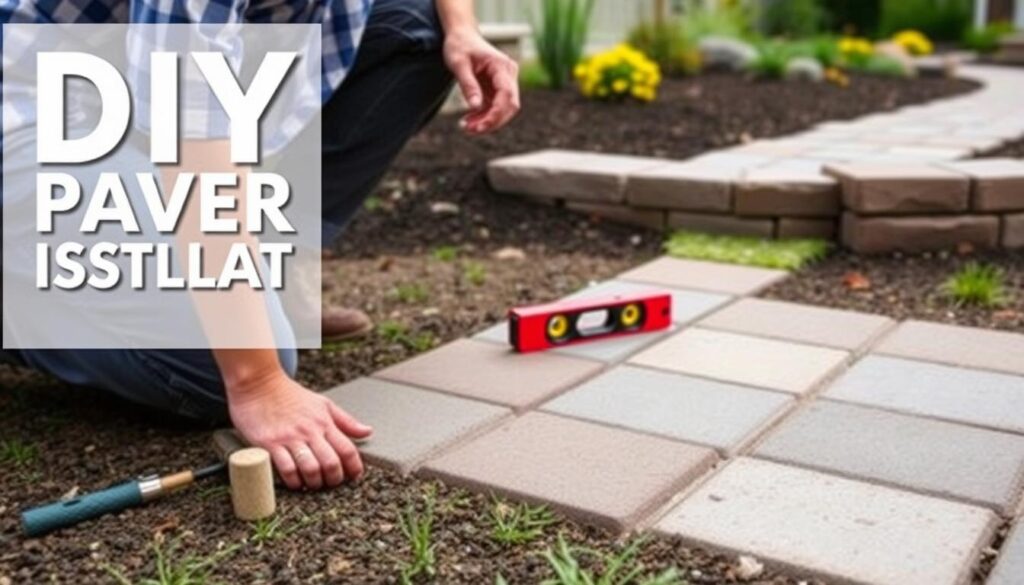
Laying and Securing the Pavers
Start laying pavers from a corner, working outward. Use a rubber mallet to set each paver firmly. Cut pavers as needed to fit edges. Install edge restraints to keep pavers secure.
Finishing Touches: Jointing Sand and Sealing
Spread jointing sand over the pavers, sweeping it into gaps. Use a plate compactor to settle the sand. Finally, consider sealing pavers to protect against stains and weather damage. This step enhances the longevity of your new paved area.
By following these steps, you’ll create a beautiful, durable surface. Remember, patience and attention to detail are key when laying pavers. Take your time with each step for the best results.
Common Challenges and How to Overcome Them
DIY paver installation projects can face many challenges. It’s important to spot and fix these issues early. This way, you can ensure your project is a success. Let’s look at some common problems and how to solve them.
Uneven surfaces are a big problem. Use a level and string line to check if the surface is even. If there are low spots, add more base material and compact it. For high spots, remove the extra material and level the area again.
Drainage issues can cause water to pool and damage pavers. Make sure the surface slopes away from buildings to help water flow. If needed, install a drainage system to keep water away.
Pavers can settle over time. To avoid this, make sure the base layer is well-compacted. If settling happens, remove the pavers, add more base, and lay them down again.
- Use polymeric sand between pavers to prevent weeds and insects
- Apply sealer to protect pavers from stains and keep their color bright
- Check your paver installation often for damage or shifting
By knowing these challenges and how to solve them, you’re ready for any problems that come up. This will help you complete your paver installation project successfully.
Maintenance Tips for Long-Lasting Paver Installations
Keeping your outdoor space beautiful and lasting is key. Regular cleaning of pavers stops dirt from building up. Start by sweeping the surface weekly to remove debris. Use a gentle detergent and scrub with a soft-bristled brush for tougher stains.
Weed prevention is also important. Apply a weed killer between joints annually to stop unwanted growth. Fill gaps with polymeric sand to create a barrier against weeds and ants. This simple step can significantly reduce the need for frequent paver repair.
- Sweep pavers weekly
- Clean with gentle detergent for tough stains
- Apply weed killer annually
- Fill gaps with polymeric sand
Even with regular upkeep, paver repair is sometimes needed. Fix small issues quickly to avoid bigger problems. Replace cracked or chipped pavers as soon as you notice them. For minor surface damage, consider using a color-matched repair kit.
Sealing your pavers every 3-5 years protects them from stains and fading. Choose a high-quality sealer designed for your specific paver type. This investment in paver maintenance will keep your outdoor space looking great for years to come.
Conclusion: Enjoying Your Newly Installed Paver Space
You’ve done it! Your DIY paver project is complete, and it’s a big win for your home. The hard work has paid off, and now it’s time to enjoy your new outdoor living space. Your paver patio is ready for you to enjoy, adding beauty and value to your property.
This transformed area opens up endless possibilities for relaxation and entertainment. Imagine hosting barbecues, lounging with a good book, or enjoying the fresh air on your new paver patio. The joy of creating this space with your own hands makes it even more rewarding.
Remember, your DIY paver installation is more than just a home improvement project. It’s an investment in your lifestyle and property value. As you relax in your new outdoor oasis, take pride in your accomplishment and the skills you’ve gained. Your paver patio enjoyment will continue for years to come, showing off your hard work and vision.
Yavapai Landscaping Prescott offers free quotes for landscaping and tree services in Prescott and its surrounding areas. This includes tree removal, trimming, stump grinding, land clearing, storm cleaning, and emergency tree service.